
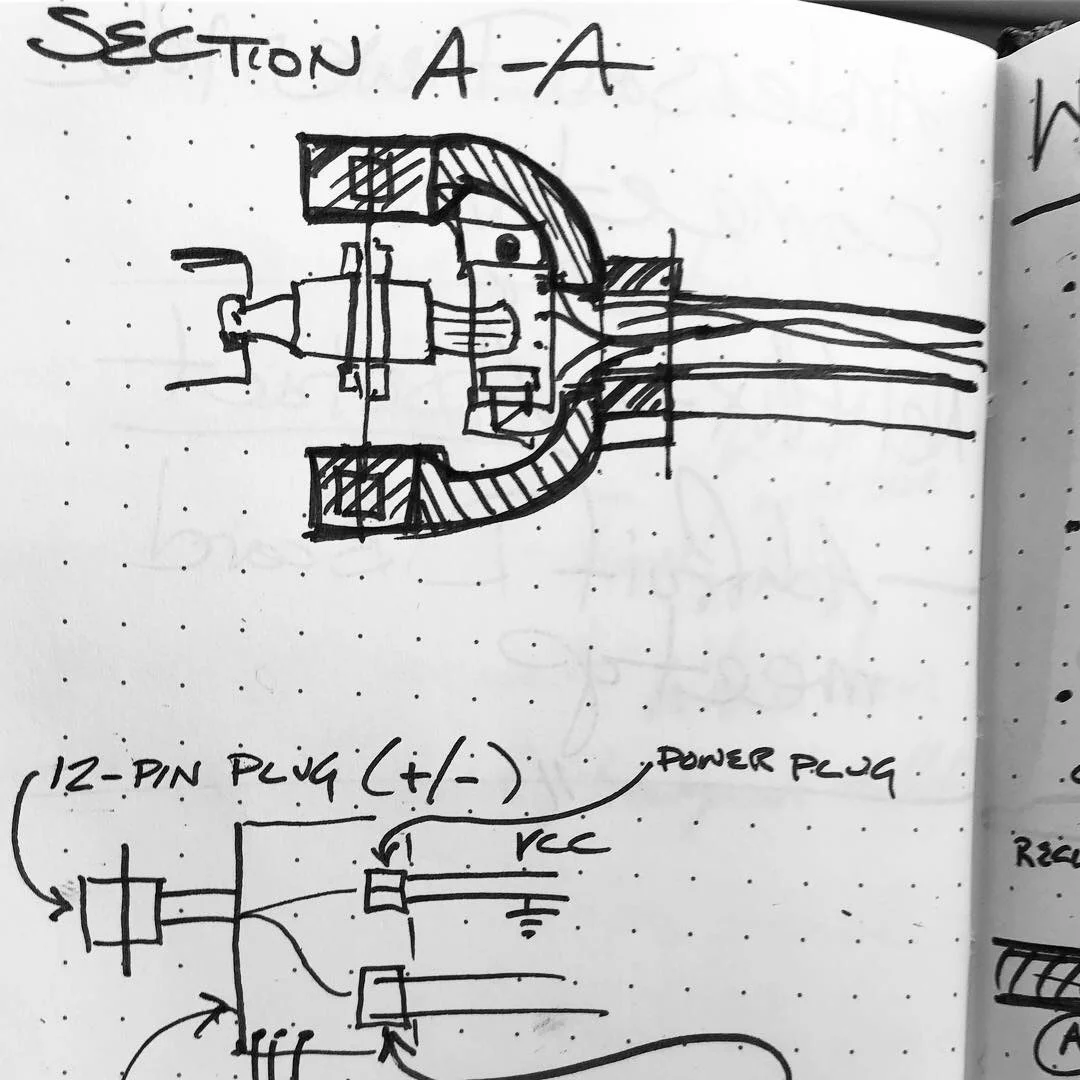
I just repaired the power circuit on Witch Lights 2. Made myself a diagram to help next time.

After meeting with the Adafruit Discord at WMFNY this year, I wrote down some ideas for improvements to the design.
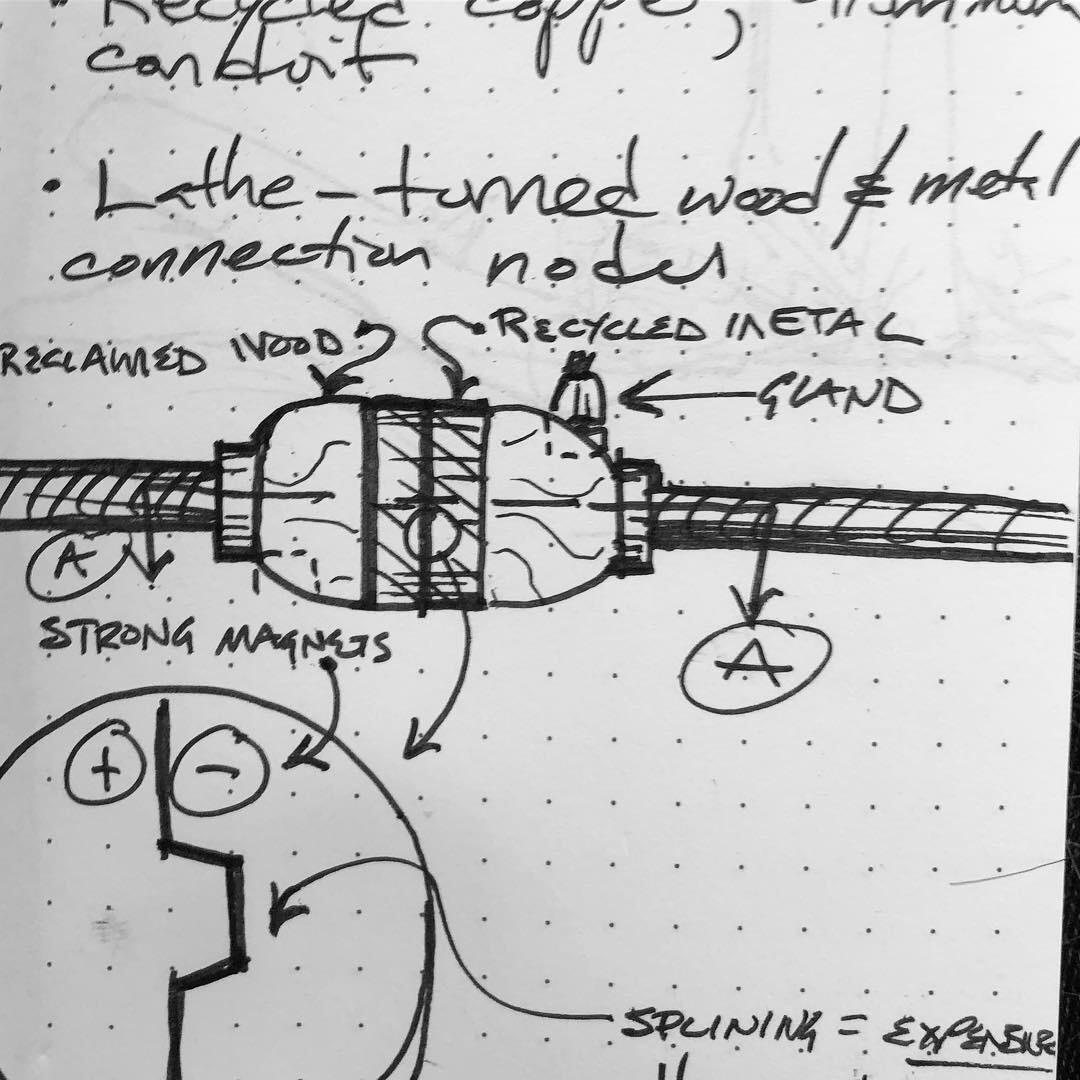
At this point I'm comfortable with the functionality enough to begin thinking of aesthetics and fabrication beyond 3D printing. Also plan to incorporate advice from the #projecthelp channel on how to make the power harness more reliable. Some notes:
Use step up and step down modules to push 12V down the length of the harness
Consider using plugs, rather than screw terminals, to connect power, LED, and data lines to circuit boards
Professionally fabricated circuit boards
Back to original vision: 5-meter segments of the harness link together as you install the lights in a location; 12-pin plugs connecting 2 halves of a machined or 3D-printed housing
Use LoRa to pass FaerieSprites from one set of Witch Lights to another along long paths and achieve original vision
Plug in additional modules, such as the (short) UV NeoPixel strips for Tree Spirits or other non-FaerieSprite animation
Moar sensors
Teensy Weensy could possibly be next gen brain replacement, having one 5V step-up pin for NeoPixel control
Solder a 3.3V power line to the low voltage VIN point of my existing PIR sensors to make them not go bugfuck at 3.3v
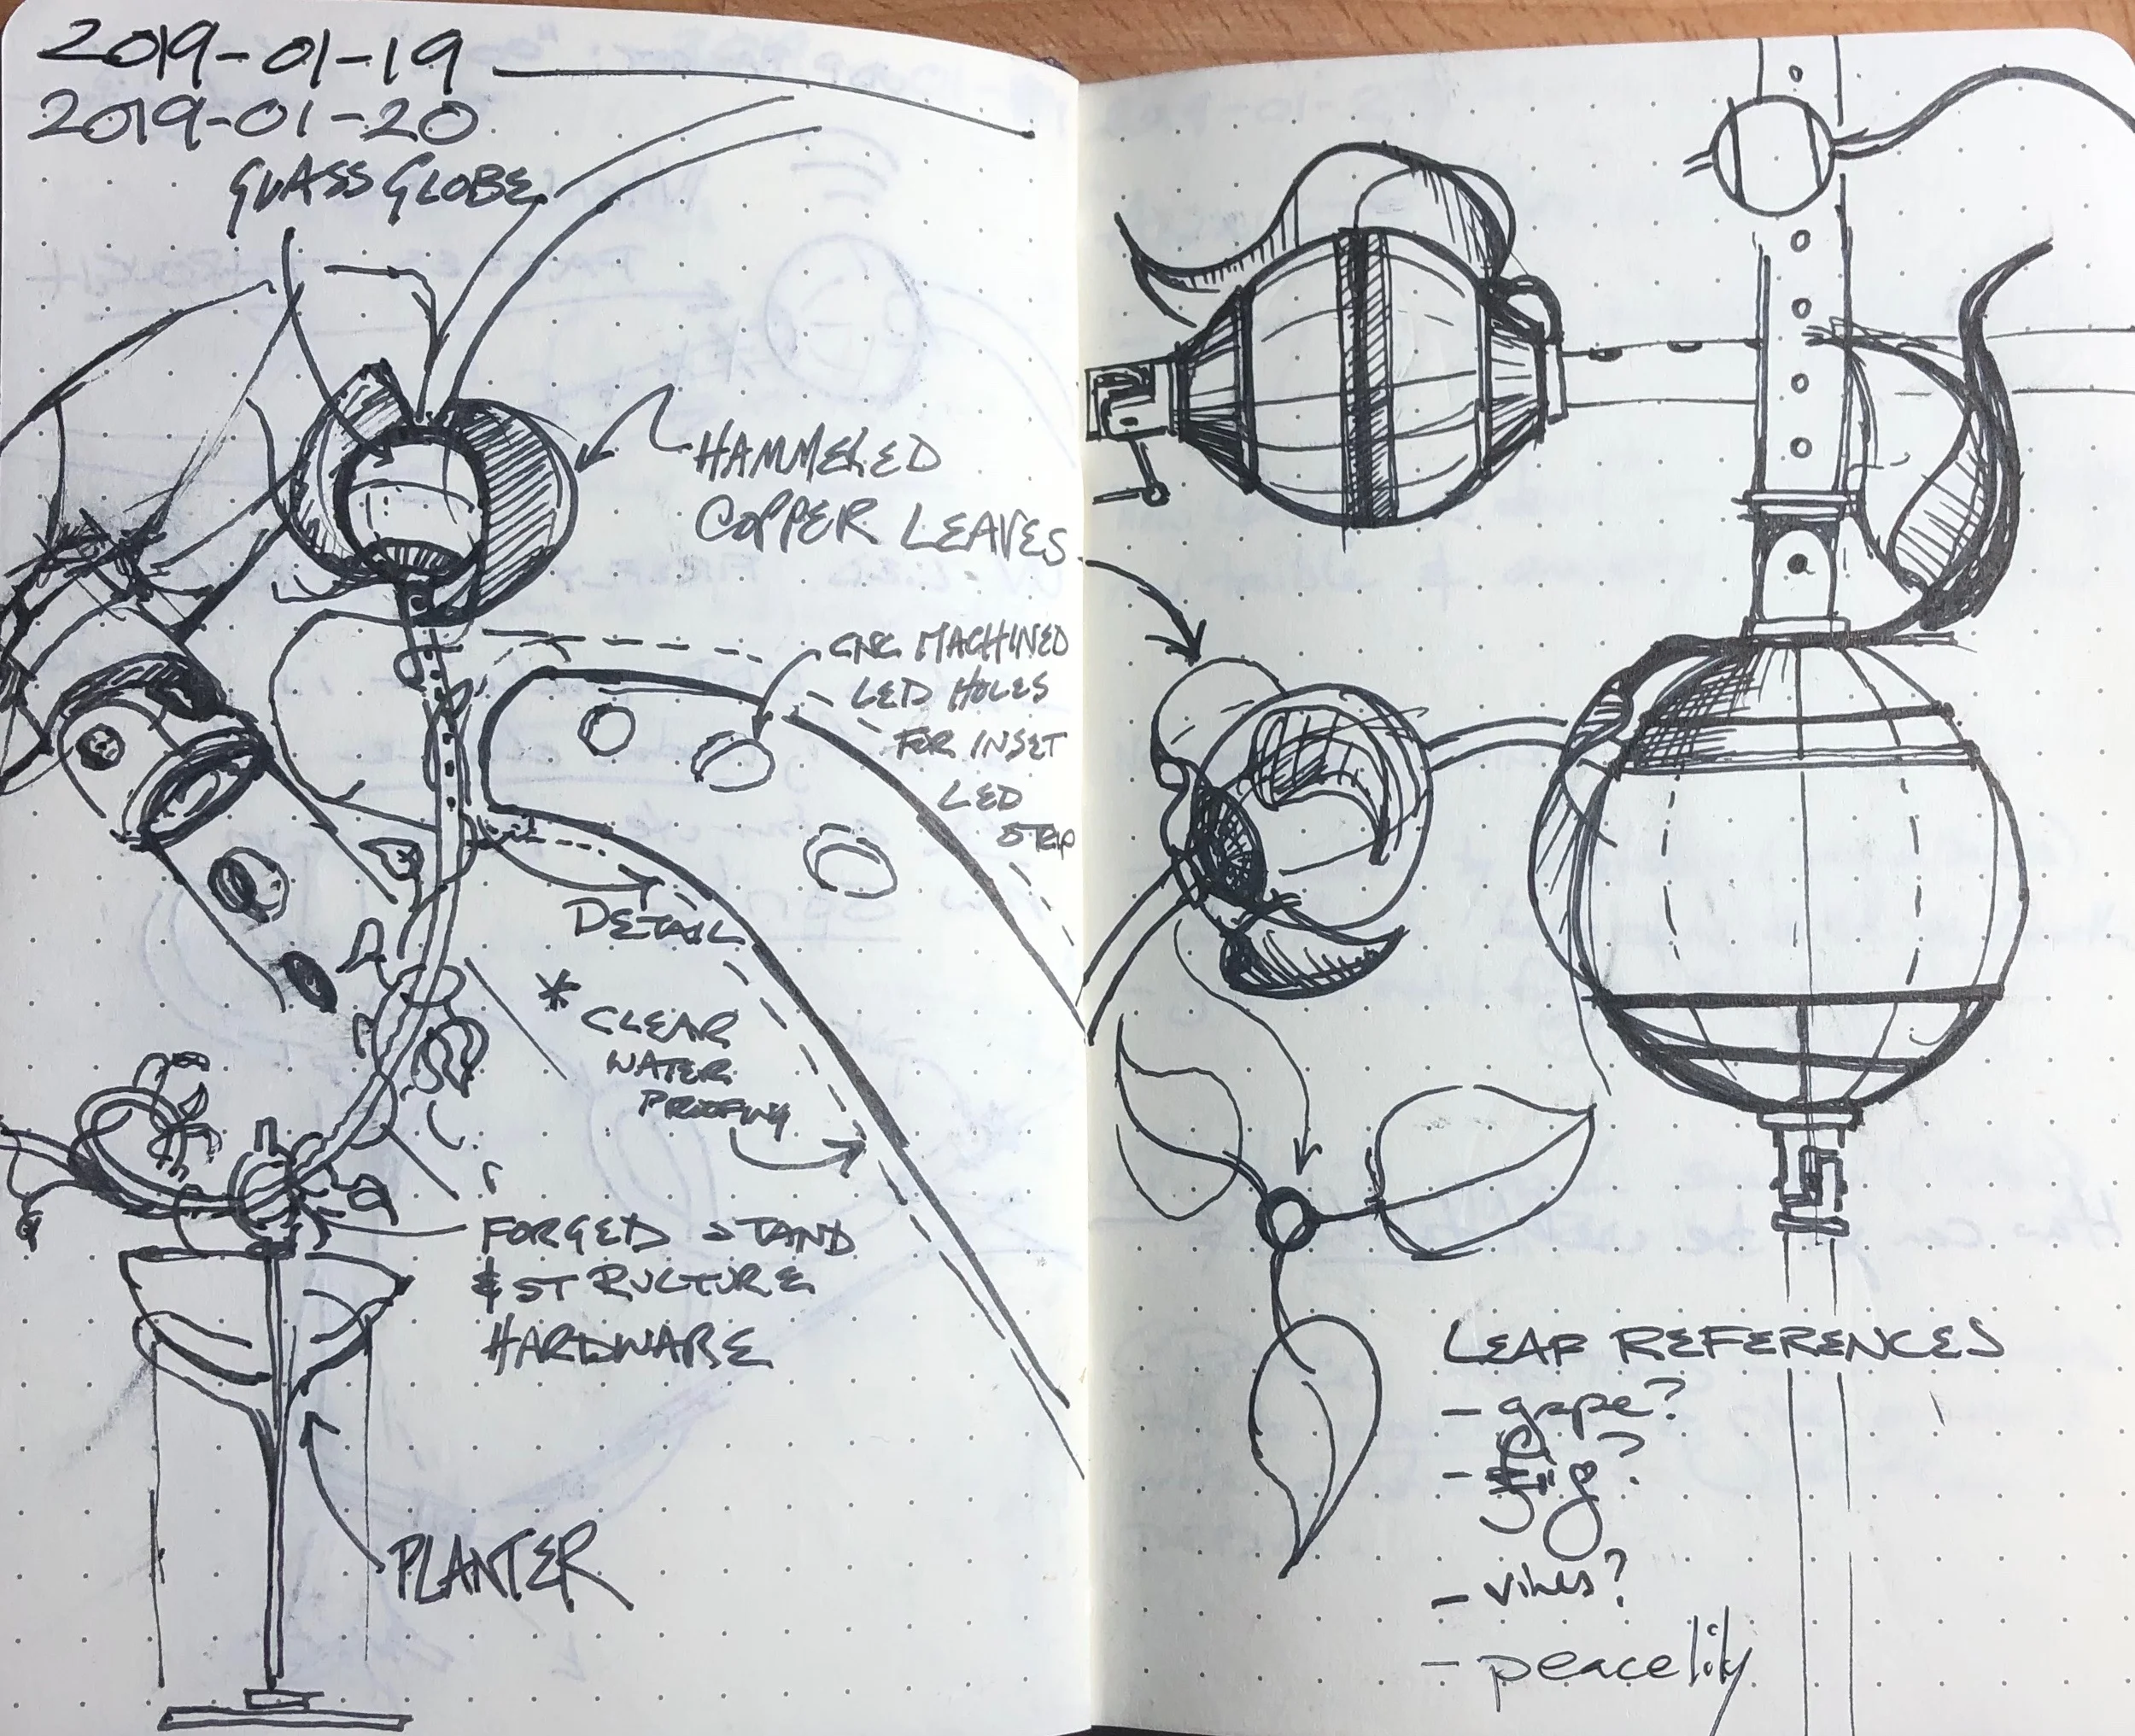
Trace paper is where I always start
At World Maker Faire last Sunday, an absolute highlight was being able to see Laura Kampf and Sophy Wong talk about design and making.
I sat with Alex Glow, and was totally thrilled with the presentation. I was especially happy when they showed their notebooks, because I, too, had documenting and sharing my sketchbook drilled into me in design school.
So that's why I'm so happy that I was able to find this photo of the most critical sketch for the Witch Lights, the paper copy of which is in one of about 6 boxes in my closet. This is where I started at one end of a roll of trace paper, and just outlined all the chain of components and elements I'd identified so far. That’s where I realized I could create a unified harness and LED structure with 3D printing.
When I started the sketch, I was considering using polypropylene chinese food containers for the junction boxes. They're recyclable, tough, water-tight, and inexpensive. But my experiment with a hole-saw and the conduit fittings had proved frustrating and laborious.
The conduit I had was 3 times the diameter of what I'd thought I was ordering at 2am the other week. But I liked the way I could make it form shapes in mid-air, and so here I was trying to lay out how using it would change the design.
Note on the left there’s an actual fitting for the harness. I had just found a solidworks model of these online, so I knew I could use my Solidworks assembly context skills to very quickly design hardware to fit it.
At the time I was thinking of printing lids for Chinese take-out containers.
In the upper left, you can see I started a marker sketch of a take-out housing, and then sketched a simpler, streamlined housing that allows the diameter of the conduit to say roughly the same all through the chain.
In the lower right: I figured out I could put sensors in the housings too, reducing another complexity
And you can also see the cable glands and 4-pin waterproof cables for the NeoPixels, which I had already figured out at this point.
It's so cool to find a moment where you pulled it all together and made a design decision that worked out. I'm excited about this!
So yeah... this is basically how I draw. It's not the best. But it gets the idea across I hope.
Next up: building an enchanted notebook so I have shots like this of all my in process work. Because I’ve lost another goddamn notebook.